توصیف
جزییات
Features:
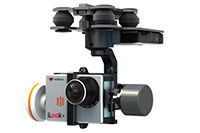
1.Full HD 1080p 30fps
2.Built-in 4 Bands 32CH 5.8Ghz 400mw transmitter
3.LENS Rotation range: ±45 degrees
4.FOV angel: 150 degrees (Diagonal)
5.Support PWM remote control
6.Support OSD
Specifications:
- Latency: about 0.15s
- Weight: 56.9g (w/transmitter, w/o cables)
Function Diagram

Precautions:
- Please make sure the DV battery is full recharged before use
- Please connect the Micro 5Pin USB cable to the DV and the other end to the 5V power source( Power adapter, PC or power-bank )
- It’ll take about 90mins to recharge. Charge Led is in red while charging and in green after fully charged.
- The PWM remote control feature fulfill with a 3 Switch of the remote controller.
- The PWM remote control feature fulfill with suited LCD display products.
Power Key/Led
- Long press Power button for 3 seconds to turn on the PWM remote Control and blue led flashes. Short press again to turn on the camera and in camera review mode.(Blue Led off after turning on and Red constant light)
- Short press once to enter system menu under Review mode
- It’s ESC button in menu mode
- Long press 3 seconds to turn off the device.
Photo Key
- Short press once to capture a photo in review mode.
- Short press once to capture a photo in recording mode.
Record Key
- Short press once to start recording in review mode and press to stop recording.
- Long press 3 second in review mode to enter playback mode.
- It’s OK button in menu mode.
UP key
- Short press once to setup the Bands
- It’s UP button in menu mode
Down Key
- Short press once to setup the channels
- It’s Down button in menu mode
Record Mode
- Red LED flashes while recording and REC icon in red
- Video files will be auto saved (reach setup video length)and create a new file to continue recording.(recording time will be displayed on the screen until stop recording)
- It’s OK to capture photo while recording
Remote Bands/Channels Setup
- Connect 3P remote control cable to one of PWM Channel of the receiver and other end to the S1 port on the camera
- To assign a Channel to Bands/Channels Setup and assign another 3 switch, C-H for Bands, C-L for channels
Remote camera control ( fulfill with suited LCD display products)
- Connect 3P remote control cable to one of PWM channels of the receiver and the other end to the S2 port of the camera
- To assign a channel to camera remote control port S2
- Connect the LCD monitor remote control output port to the PWM input of the remote control. Then you can operate the camera via the LCD monitor
External OSD Device
- Press both UP/DOWN button at the same time in review mode to switch the camera to OSD transmitter mode. Then the video output to the external OSD and then back to the camera
- Press the two buttons again back to normal video transmitter mode
Menu List

Specifications

توضیحات اضافی
اطلاعات اضافی
| تولید کننده | skyzone |
|---|
برچسبها
نظرات
- برای نظر دادن به این محصول اولین باشید


